Export & Delivery
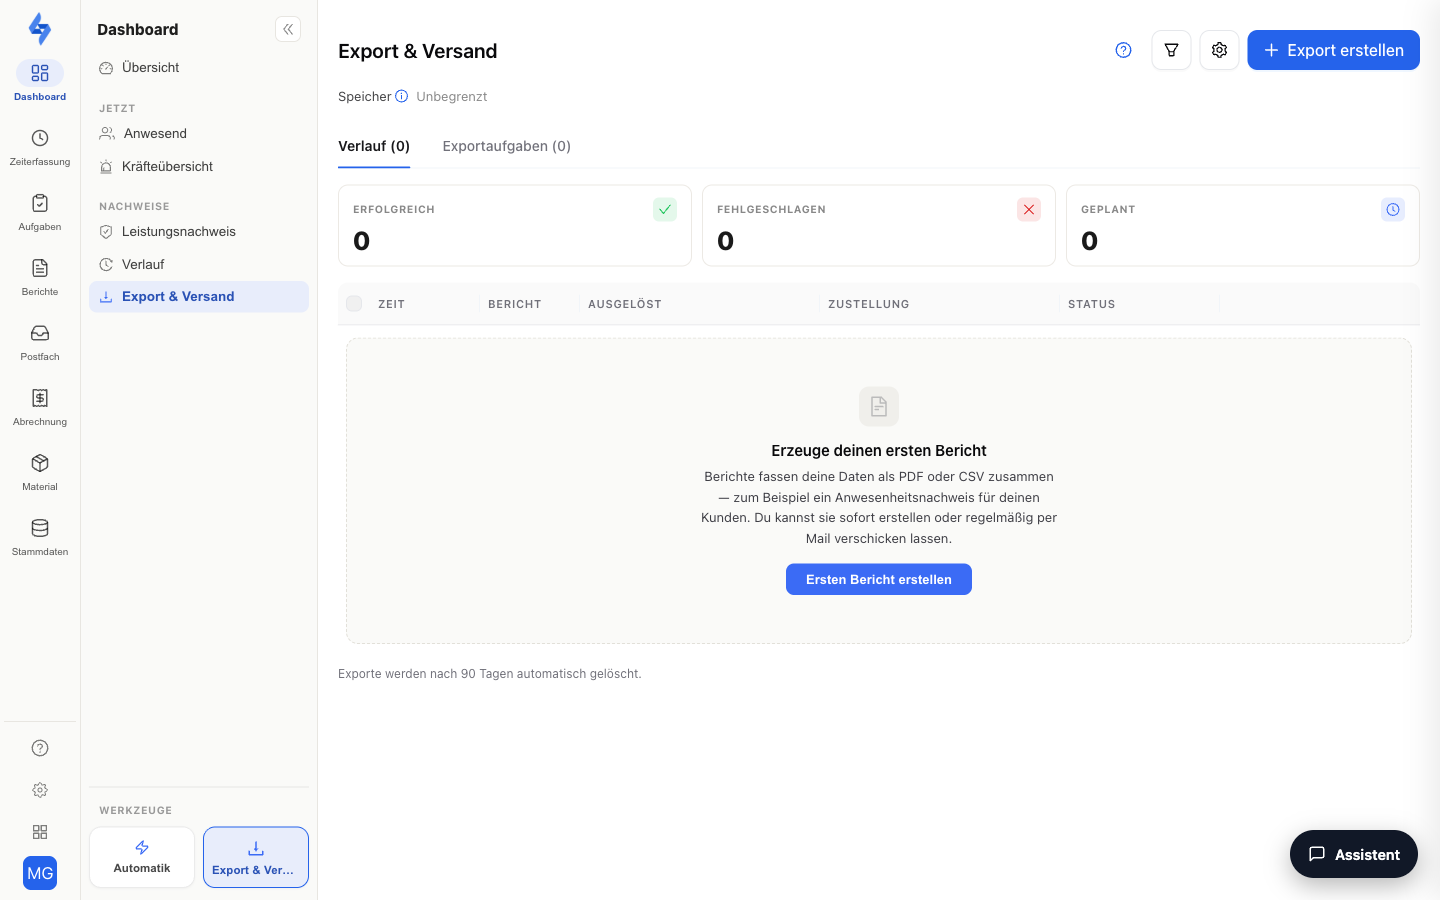
Under Dashboard → Evidence → Export & Delivery (/dashboard/exports, also available as the Export & Delivery entry in the tools footer of the sidebar; in Time only on pages with an export: Entries, Operations, Work days, Live and the operation detail) you generate reports (PDF, CSV, Excel, or ZIP), download them, or set up automatic, recurring email delivery. The overview refreshes automatically while exports are running.
What Is This View For?
This view is the central place for all reports and their delivery: download once or send automatically on a regular basis (e.g. "every Monday, send last week's patrol report to the control center"). It answers:
- I need a report as PDF, CSV, or Excel right now.
- I want a report sent automatically by email every week/day.
- Which exports ran recently — and can I download them again?
- I want to assemble a custom report from building blocks (custom template).
Individual lists (rounds, incidents, time tracking …) each have their own export button — those exports also end up here in the History.
:::info Prerequisite
You need the Export round evaluation permission (EXPORT_REPORTS). It controls the entire page and the creation/scheduling of exports.
:::
The Two Tabs
| Tab | Content |
|---|---|
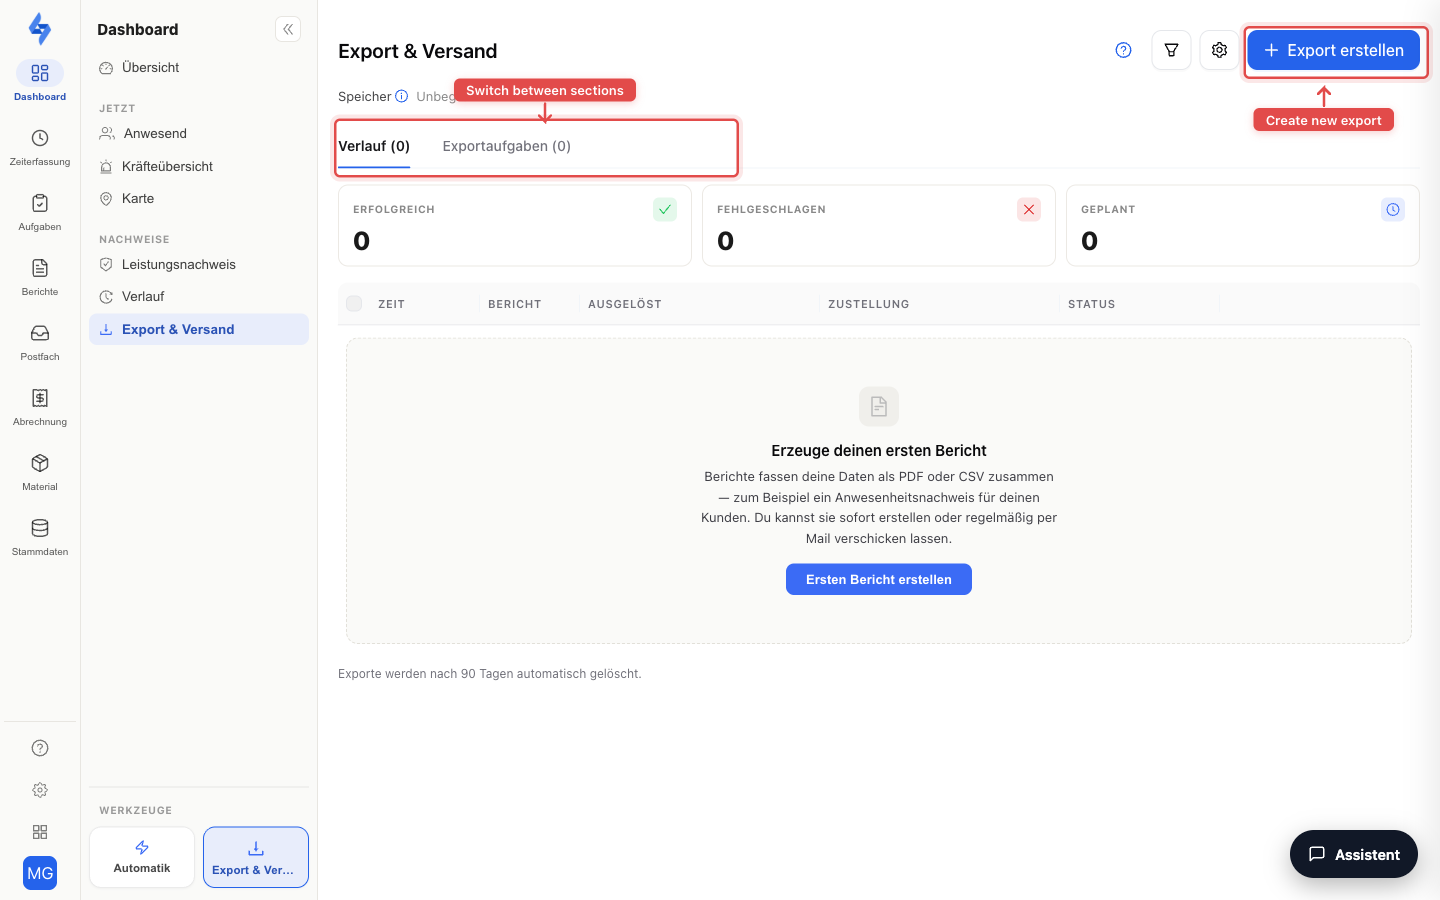
| History | Already triggered exports (and — optionally — upcoming scheduled deliveries) |
| Export tasks | Configured scheduled deliveries (subscriptions) — edit, pause, test. The header button here is called "Schedule delivery" |
Custom report templates are managed under Settings → Templates → Reports; old links to the former "Templates" tab redirect there.
At the top: the storage indicator (used export storage of your plan, possibly "Unlimited"), key figures (Successful / Failed / Scheduled), and the + Create export button.
History — Table & Actions
| Column | Description |
|---|---|
| Time | Time of the run (or next occurrence for scheduled deliveries) |
| Report | Report name + format badge (PDF/CSV/Excel/ZIP) |
| Triggered | "Manually by …" or Automatic (scheduled delivery) |
| Delivery | By email (with recipient) or Download |
| Records | Number of rows included |
| Size | File size |
| Status | Ready / Queued / Running / Failed / Cancelled (or Scheduled) |
Filters (filter icon): date range (max. 62 days back), type (All types / Manual / Automatic dispatch), property, and the "Show scheduled deliveries" toggle. Use the gear to show/hide columns.
Per row: Download, Share (public link), Delete; failed runs can be restarted. Clicking a completed run downloads the file directly. Multiple runs can be selected and downloaded/deleted in bulk.
Creating or Scheduling an Export
The "+ Create export" dialog walks you through the following steps (with a live preview of the selected report on the right):
1. Select report — one or more templates. Pinned at the top is the Log (tasks, patrols, incidents & reports): the combined report whose content you pick freely via checkboxes (patrols, checkpoint scans, incidents, tasks, reports). Below it, the remaining standard templates follow, grouped by topic:
| Group | Report | Content |
|---|---|---|
| Patrols | Daily target | Target/actual of scanned checkpoints per day and property |
| Time tracking | Time tracking | Working hours per shift, per person and property |
| Attendance | Attendance list | Who is checked in right now, with status and location |
| Attendance | Evacuation list | All currently present persons per property, for check-off in an emergency |
| Attendance | Attendance (period) | Attendance per person and day (one property is required) |
In addition, there is the Custom templates group — self-created report templates (see Creating Custom Report Templates). Use "Manage templates" to jump to Settings → Templates → Reports. Other reports (e.g. Activity, QR code sheets, dashboard PDF, service-level report) are started directly on their respective pages — they also appear here in the History.
The Material group contains four further templates; usable with the Material feature enabled (see Material on the property) and the View material stock permission:
| Group | Report | Content |
|---|---|---|
| Material | Material stock | Stock list with inventory value — stock per property and warehouse, with valuation |
| Material | Material usage | Usage and costs per property and item in the period |
| Material | Material journal | Every single booking as a chain of evidence — all stock movements with person, reason and reference |
| Material | Reorder list | Items below minimum stock — what needs reordering where |
2. Properties — All properties or Selected properties. (Analytics always run across all properties; operational reports generate one file per property.)
3. Role filter (attendance reports only) — optionally restrict to specific roles; leave empty = all persons.
4. Delivery type — Download now or Schedule delivery:
Download Now
- Time span: Today / Last 10 days / Last month / Custom (max. 31 days).
- Anchor time: shifts the "day boundary". Example: 06:00 means 06:00 today → 06:00 tomorrow — matching shift days.
Schedule Delivery (Recurring)
- Frequency: Daily, Weekly (+ weekdays), Monthly (+ day), or Per day shift (one delivery subscription per selected shift, sent as soon as the shift ends).
- Anchor time / delivery time: when it is sent.
- Recipients: at least one email address.
- Email text: default subject/text or a custom message with the placeholders
{{property}},{{date}},{{period}}.
5. Format — PDF, CSV, and Excel can be combined freely; scheduled deliveries also support all three formats. In the CSV file, line 1 is always the table's header row; the key figures (where the report has any, e.g. scans, patrols, properties) follow a blank line at the end of the file. Compared to CSV, Excel gives you real date, number, and duration cells, a frozen header row with filters, and the key figures on a second sheet "Key figures". Additionally As ZIP (if included in your plan), optionally with a password (AES-256 encrypted):
:::warning ZIP password For direct downloads the password is not stored — write it down; leave empty = ZIP without a password. For an encrypted delivery rule the password is required and stored on the subscription — share it with the recipients through a separate channel. :::
You also choose the language of the report (German or English).
Managing Scheduled Deliveries ("Export Tasks" Tab)
The Export tasks tab lists all configured scheduled deliveries with the columns Property, Recipients, Frequency, Time range, Reports, Last run, and Actions. For each task you can edit it, pause/resume, delete, and send a test email to any address (does not change the saved recipients). Delivery runs automatically server-side at the configured time.
Plan limit: The number of active delivery subscriptions depends on your plan — 3 in Starter, 10 in Standard, unlimited in Premium. What counts is the active subscriptions, not the individual dispatches: how often a subscription runs and how many reports it sends does not matter. The former counter "Report dispatches per month" no longer applies. If the quota is not enough, combine subscriptions or change your plan — see Choose a plan.
Creating Custom Report Templates
:::tip You can build your own export templates Under Settings → Templates → Reports → "Create template" you assemble custom reports from building blocks — without changing the standard templates. This gives you, for example, a cover page with your logo, exactly the table columns you want, and your own text block in one PDF. :::
The list under Settings → Templates → Reports shows all templates (standard + custom) with Name, Sections, Visibility, and Last modified (standard templates show "—" there as long as they are unedited). The editor has two steps:
- General — Name (required), description, and visibility: Only me or Entire team.
- Content — three areas: Sections (left), Configuration (center), and Preview (right, "Generate preview" → PDF). Use "Add section" to insert building blocks:
| Building block | Purpose |
|---|---|
| Cover page | Title page — optionally with company logo (from Settings → Branding) |
| Day · Date · Property | Header with context |
| Key figures | KPI tiles — in CSV exports as a block at the end of the file, in Excel as a second sheet |
| Table | Data table (columns + order selectable) |
| Map | Locations/GPS on a map |
| Text block | Free text (preserved in the PDF) |
| Signature | Signature fields (left/right labels adjustable) |
| Custom | Your own HTML (scripts are removed) |
For each table/data section you choose the data source (e.g. time tracking, attendance list, patrols, checkpoint scans, incidents) and the columns — their order determines the column order in the PDF. Saved custom templates then appear in the export dialog under Custom templates and can be downloaded or scheduled just like the standard reports.
Audit exports for auditors
Eight exports document the audit trail towards auditors: settings audit trail, activity log, signature log, task completions, reports, form PDF, template definitions with change requests and user list. They start on their respective page and appear here in the history. What every column means and how the files can be cross-checked is described under Evidence package: exports for auditors.
Share Link
Use Share to generate a public download link for a completed export (no login, time-limited). The link can be revoked at any time.
Good to Know
- Automatic history entry: Exports from the individual lists (e.g. "Export patrols") also appear here in the History.
- QR code PDFs: Your employees' login QR codes are downloaded under Employees (select people → Download QR codes). The run lands here in the History and can be downloaded again at any time.
- PDF too large? With very many rows, the dialog suggests CSV instead of PDF; it does not offer Excel here.
- Background processing: Exports run in the background — you can leave the page and return later.
Permissions
| Action | Permission |
|---|---|
| Open the page, export, schedule, manage templates | Export round evaluation |