Material (property)
On this tab you manage the consumables stock of the selected property — for example toilet paper, soap, bin liners or road salt. You see the current stock per item with a traffic-light status, define minimum and target quantities, and record bookings and counts.
Navigation: Master data → Properties → select property → panel entry "Material"
What is this view for?
Stock is not maintained as a number — it is computed: every refill, consumption and correction is a booking in the journal; stock is the sum since the most recent count. Every figure is therefore verifiable — the per-item history shows who booked what and when.
The items themselves (name, unit, category, purchase price) are maintained centrally under Master data → Material; this tab manages the stock of this property.
The stock table
| Column | Meaning |
|---|---|
| Status | Traffic light: Sufficient (at or above minimum), Low (below), Empty (0), Count needed (computed negative — only a count fixes this), No target (stock on hand but no minimum/target quantity set — never counted as "below minimum stock"; 0 pieces without a target is Empty) |
| Item | Name with category and unit |
| Stock | Computed current stock (most recent count + bookings after it) |
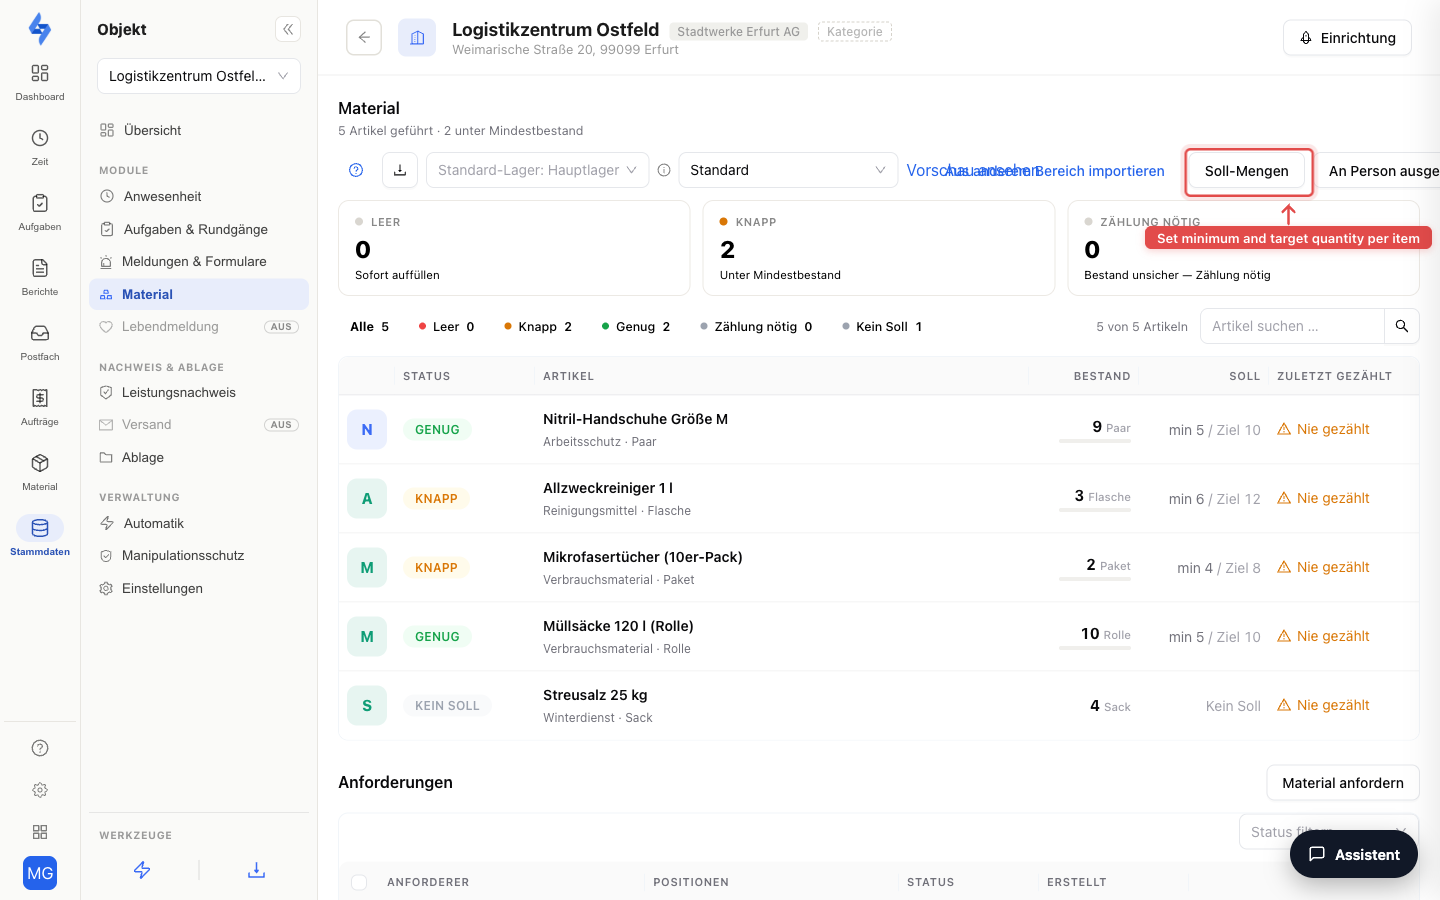
| Minimum | The alert threshold from the target quantities |
| Last activity | Time of the most recent booking |
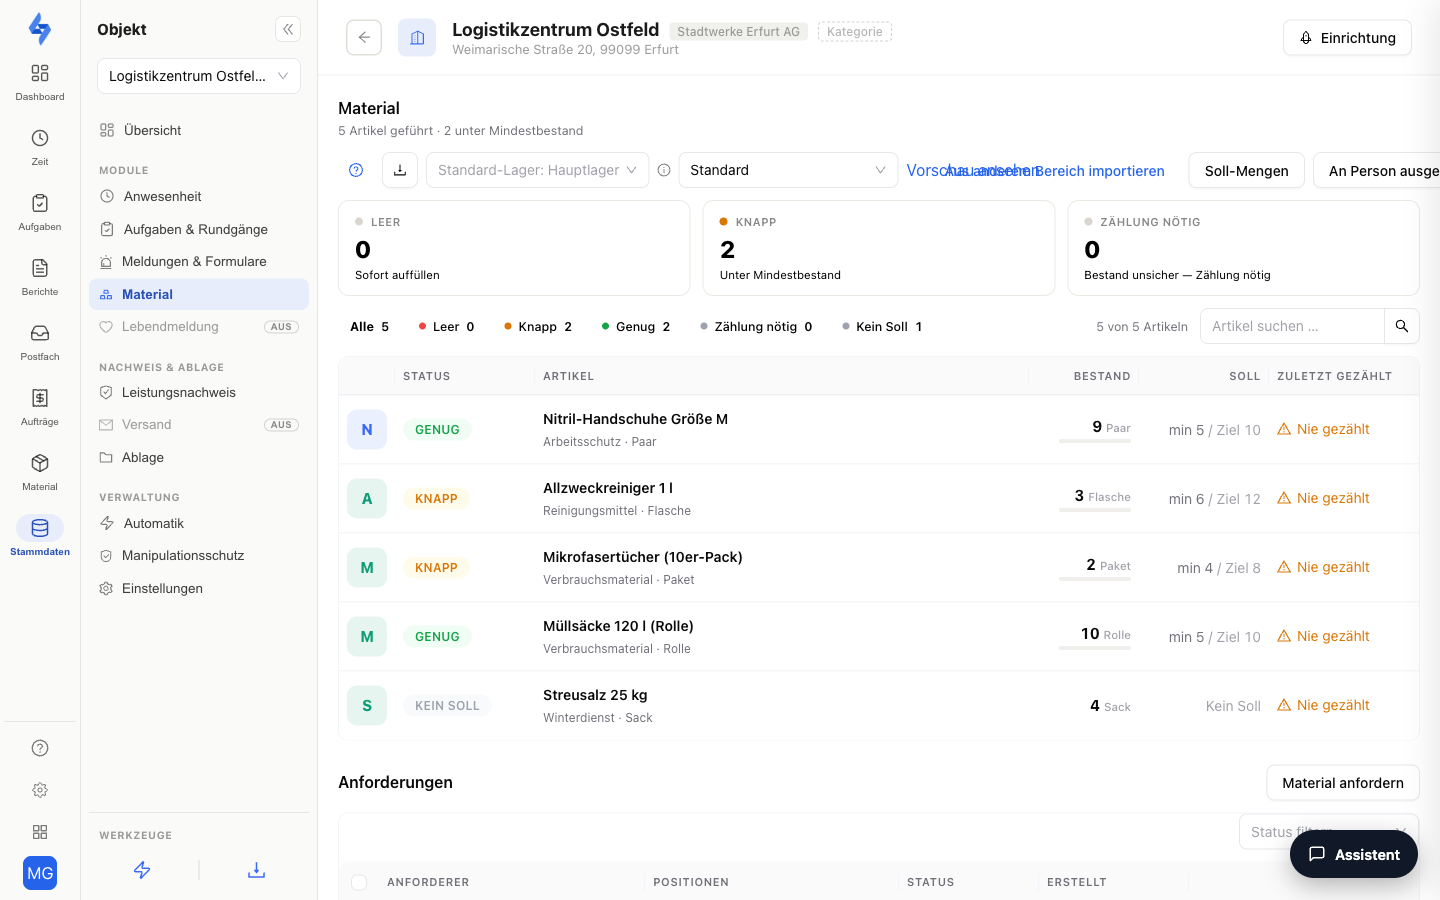
Clicking a row opens the item's history as a side panel — every booking with date, quantity, reason and note.
Actions
| Action | Effect |
|---|---|
| Add booking | Record a refill (+), a consumption (−) or a correction. |
| Record count | Capture the physically counted stock — it becomes the new baseline of the calculation. Regular counts keep the numbers honest. |
| Target quantities | Set the minimum stock (alert threshold) and optionally a target quantity per item. |
| Issue to person | Issue equipment or serialized units from the property stock to an employee — with signature and receipt (see below). |
Requests
When something runs out on site, nobody has to call: via material requests, your staff (in the LiteLog app), your back office (in the portal) or — with the feature enabled — your customers (in the customer portal) report the need, and a responsible person decides on it.
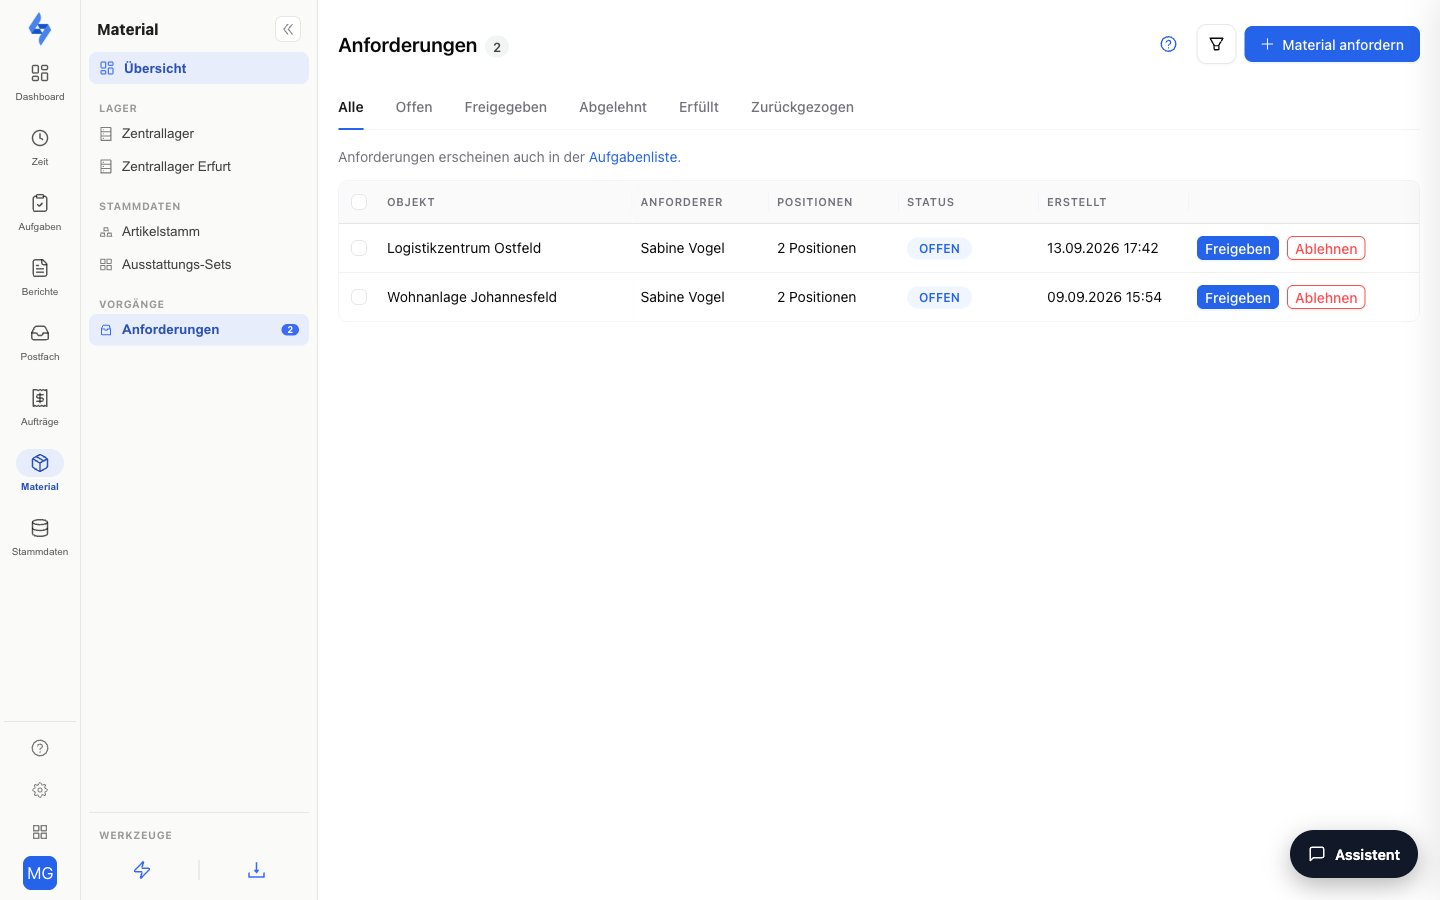
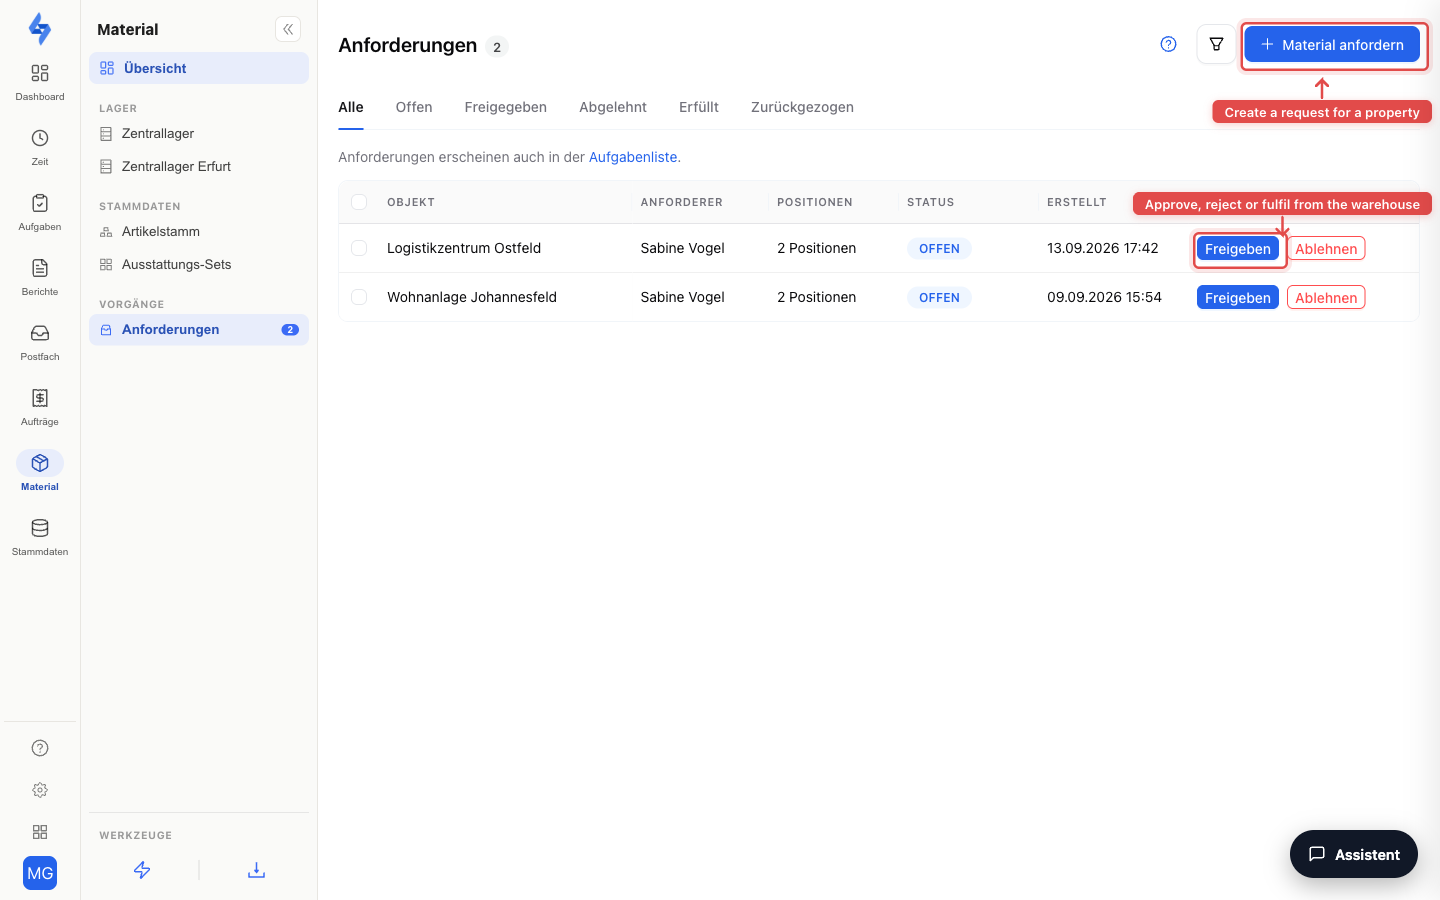
Requesting
On this tab you find the "Requests" section with the "Request material" button: pick one or more items, enter a quantity per position and optionally add a note. The quantity is pre-filled with the gap to the target quantity (target quantity minus current stock) — anyone who simply wants to "top up" confirms without typing.
In the app, the "Material requests" screen (under More) covers the same flow: create a request — also offline, it is transferred on the next connection —, review your own requests and withdraw pending ones. Per item the app shows "unit · stock n · target m" (stock only while online); the first tap on "+" sets the shortfall up to the target (stock at or above target: 1; unknown stock: the target), and "Fill everything to target" sets all items with a shortfall in one step.
Approving, rejecting, fulfilling
All requests arrive centrally under Master data → Material in the "Requests" tab — filter by status there. Deciding requires the permission "Approve material requests"; it is already assigned to the management roles.
The lifecycle of a request:
| Status | Meaning |
|---|---|
| Pending | Received, not yet decided. The requester can still withdraw it. |
| Approved | Granted — waiting to be fulfilled. |
| Rejected | Declined, optionally with a reason; the requester sees it. |
| Fulfilled | The material was delivered and booked. |
| Withdrawn | Taken back by the requester while it was still pending. |
"Approve" on a single request asks for confirmation in a dialog before it books. "Fulfill" closes the loop to the stock — on both sides: the fulfill dialog shows the list of positions (item · quantity · unit; positions for which the source warehouse does not hold enough stock are marked red) and the source warehouse. Per position, LiteLog books a goods receipt at the property (reason "Refill") and the outflow in the chosen source warehouse — as an issue (not as consumption) with the request's note. The property's stock rises, the warehouse stock falls, the purchase price is locked in at booking time like with every booking, and the minimum-stock alert works with the new level.
About the source warehouse:
- If your tenant runs several warehouses, the fulfill dialog shows the "Source warehouse" picker. It is preset in this order: a source warehouse already noted on the request (if present) → the property's default warehouse (see below) → the main warehouse. With only one warehouse the picker is omitted — the dialog shows it as a fixed line (for example "Source warehouse: Central warehouse"), and bookings go there.
- If the chosen warehouse does not hold enough stock, the portal warns: the stock in the selected warehouse is not sufficient for the listed items; fulfillment still books — the warehouse stock goes negative ("count needed"). Fulfillment is therefore not blocked; the negative warehouse stock shows as status "Count needed" and is healed by a count.
- The request detail view (clicking a request opens the side panel) shows the source warehouse of a fulfilled or pre-assigned request as its own row.
Default warehouse per property
If your tenant runs several warehouses, global accounts with the permission Edit properties can set the "Default warehouse for requests" picker at the top of the property's Material tab (placeholder: "Default warehouse: main warehouse"). It determines from which warehouse requests of this property are fulfilled by default — for example the warehouse of the responsible branch. Without a selection, the main warehouse applies.
:::tip Notifications Two automation triggers cover requests: "Material request received" and "Material request decided". Two matching default rules are bundled — incoming requests to the responsible people, the decision to the requester — but are deliberately disabled: enable them in the Automation area when needed. :::
Sales price (rebilling)
If you use LiteBill, set a sales price and a tax rate per item in the edit window of the item catalog (Master data → Material). Both are the basis for rebilling a customer's material consumption — items without a sales price are not billed. The flow is described on the Invoices page.
Capturing in the app
In day-to-day work your staff record consumption and resupply when completing a task in the LiteLog app: if the task carries "Expected material" (in the task editor under "Add details"), the completion screen shows the items pre-filled with the expected quantity — confirming takes one tap; only deviations are adjusted. For each item the back office sets the direction in the task editor: Withdrawal books the consumption from the property stock (e.g. consumables at a motorway service area per cleaning round), Refill the resupply to the property. The completion step is accordingly called "Material consumed" or "Material refilled". The bookings are created automatically with the completion and also work offline.
In addition, the app has its own stock view for the property under More → Material: the traffic-light list of all items with stock and minimum quantity (stock loads while online; offline the list shows items and minimum stock from the device cache). Tapping an item opens capture:
- Book — consumption (−) or refill (+) with quantity, note and optionally one photo (e.g. of the delivery note or shelf). The photo appears in the portal in the item's history.
- Count — record the physically counted stock; it becomes the new baseline of the calculation. If bookings are still waiting for upload, the app points this out — count the physical stock then.
Both work offline and are transferred automatically once the device is back online. The "Material below minimum stock" hint in the "My assignment today" widget of the home screen (with a planned shift) opens the stock view of the assignment's property with one tap.
Issuing to persons
If an item in the catalog has the kind Equipment or Serialized units (see Material & equipment (master data)), you can issue it from the property stock directly to an employee — for example workwear from the on-site store or the radio of the guard post.
- The "Issue to person" button opens the issue dialog: choose the recipient, one or several items in a single transaction (for serialized items the specific unit by serial number), the recipient signs directly on screen — and the issue receipt is created as a PDF.
- The issue reduces the property stock like any other outgoing booking; if stock falls below the minimum as a result, the notification fires as usual.
- What has been issued then appears on the employee's equipment account (employee detail page → "Equipment" tab) — return, loss report, shift handover and the receipt list with all documents live there too: Equipment account (employee).
- If a person still holds issued units (say a key or a radio) after shift end, the automation trigger "Material not returned after shift end" fires. The included rule "Material not returned → employee" reminds the person via push and in-app notification; on new accounts it is active from the start. If needed, you can add an escalation to supervision (delay + state probe "returned in the meantime?") in the workflow editor.
Warehouses (Master data → Material → "Central warehouse")
Besides per-property stock, LiteLog tracks warehouse stock without a property reference — for example the material store in your office or depot. You find it under Master data → Material in the "Central warehouse" area (tab next to the item catalog). On first use there is exactly one warehouse named "Zentrallager" (central warehouse); under Settings → Material, "Warehouses" section you create as many further warehouses as you like — per branch, vehicle or depot.
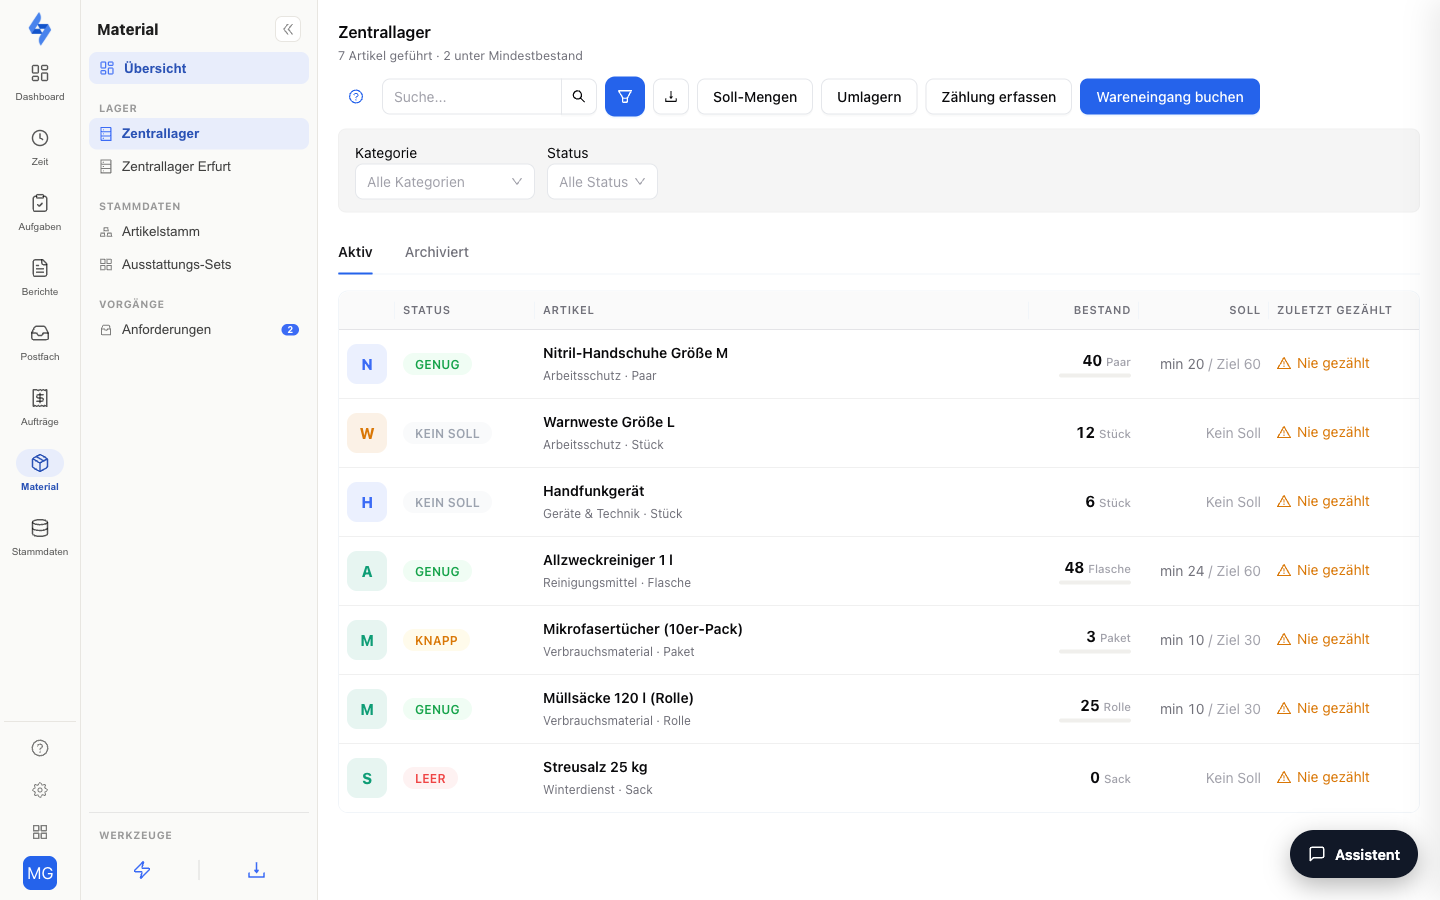
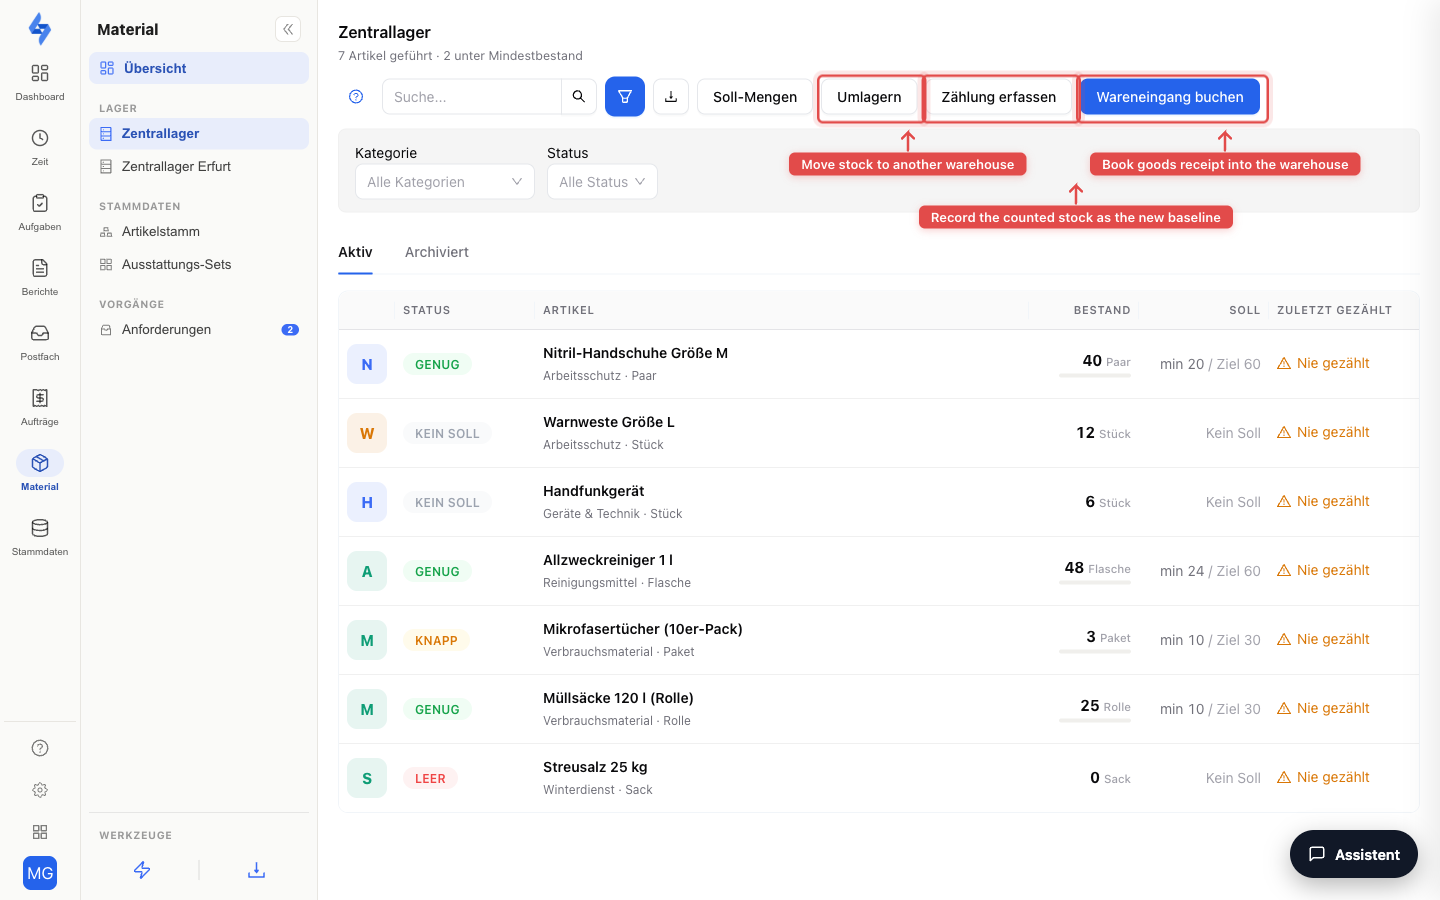
- Record goods receipt (+): capture a delivery into the warehouse. There are also withdrawal (−) and correction (±); a count anchors the calculation just like at a property.
- Several warehouses: from two warehouses onward the page header shows a warehouse picker — stock, target quantities, journal and counts always apply per warehouse; the main warehouse is marked "(main warehouse)" in the picker. The selected view is part of the address as the
?wh=parameter, so it can be linked directly. - Transfer: from two warehouses onward there is the "Transfer" button: item, quantity, target warehouse and an optional note — LiteLog books the outflow in the current warehouse and the inflow in the target warehouse in one step; both journal rows carry the reason "Transfer".
- Target quantities work like at a property and apply per warehouse: when a warehouse's stock falls below the minimum, the same trigger "Material below minimum stock" fires — notifications name the warehouse as the location. Rules scoped to a specific property deliberately do not react to warehouses.
- The table shows all active items of the catalog, even at stock 0 — a newly created item can be booked immediately.
- Creating and editing warehouses works right here: the "Create warehouse" entry below the warehouses in the left menu (or "More" → "Create warehouse" on the Material overview) opens the warehouse dialog, the pencil next to the warehouse name opens it for editing. In the dialog, "Assigned accounts" selects which accounts see this warehouse — the line below the warehouse name shows the state ("Assigned: …" or "Visible to all global accounts").
- Only accounts with global visibility (management/office) see the warehouses; property-bound staff and customer access accounts do not. In addition you can restrict visibility per account to specific warehouses (for example a branch manager to their own warehouse) — in the "Visibility per account" block under Settings → Catalogs → Material; the restriction applies to the switcher, bookings and request fulfillment.
Good to know
:::tip Note
- When an item's stock falls below the minimum, the automation trigger "Material below minimum stock" fires — the bundled default rule emails the first admin; adjust recipients and channels in the Automation area.
- For the consumption evidence per property and period there is the report "Material usage" (CSV or PDF): inflows, outflows, costs with the purchase price at booking time, and the last count; generated runs appear under Dashboard → Export & dispatch in the history. There you can also schedule the report via "Schedule delivery" as a recurring email delivery (export task) — for example monthly to the back office. Besides usage, three further material templates are available in the export dialog: Material stock, Material journal and Reorder list.
- The report "Material plan vs. actual per task" (export menu "Plan vs. actual per task", PDF or CSV) compares the expected material stored on a task with the quantities booked on completion: plan = default × completions in the period, actual = booked quantity, plus the deviation in absolute terms and in percent. Completions without a booking count as a deviation; the period is based on the completion time, without a period the last 30 days apply.
- The cost of each booking is locked in with the purchase price at booking time — later price changes in the catalog never rewrite past reports.
- The Material journal shows two timestamps per booking: Timestamp (booking on the device) and Received (receipt by LiteLog); in the per-item history the receipt appears as a hint on the time column — an offline booking that was synchronised later is recognisable that way.
- If the feature is disabled, the tab shows an activation card; the menu entry stays visible but greyed out. For properties in the cleaning and facility-service industries the feature is already enabled on creation.
- Above the per-property switch sits the tenant-wide company switch of the Material feature under Features — as long as it is off, material appears nowhere: neither in the portal nor in the LiteLog app nor in the customer portal. :::