Reports
The "Reports" area is the combined record of incidents and completed forms. Everything the people in your team capture in the portal or via the mobile app — from a damage report to a handover protocol — ends up here in one list.
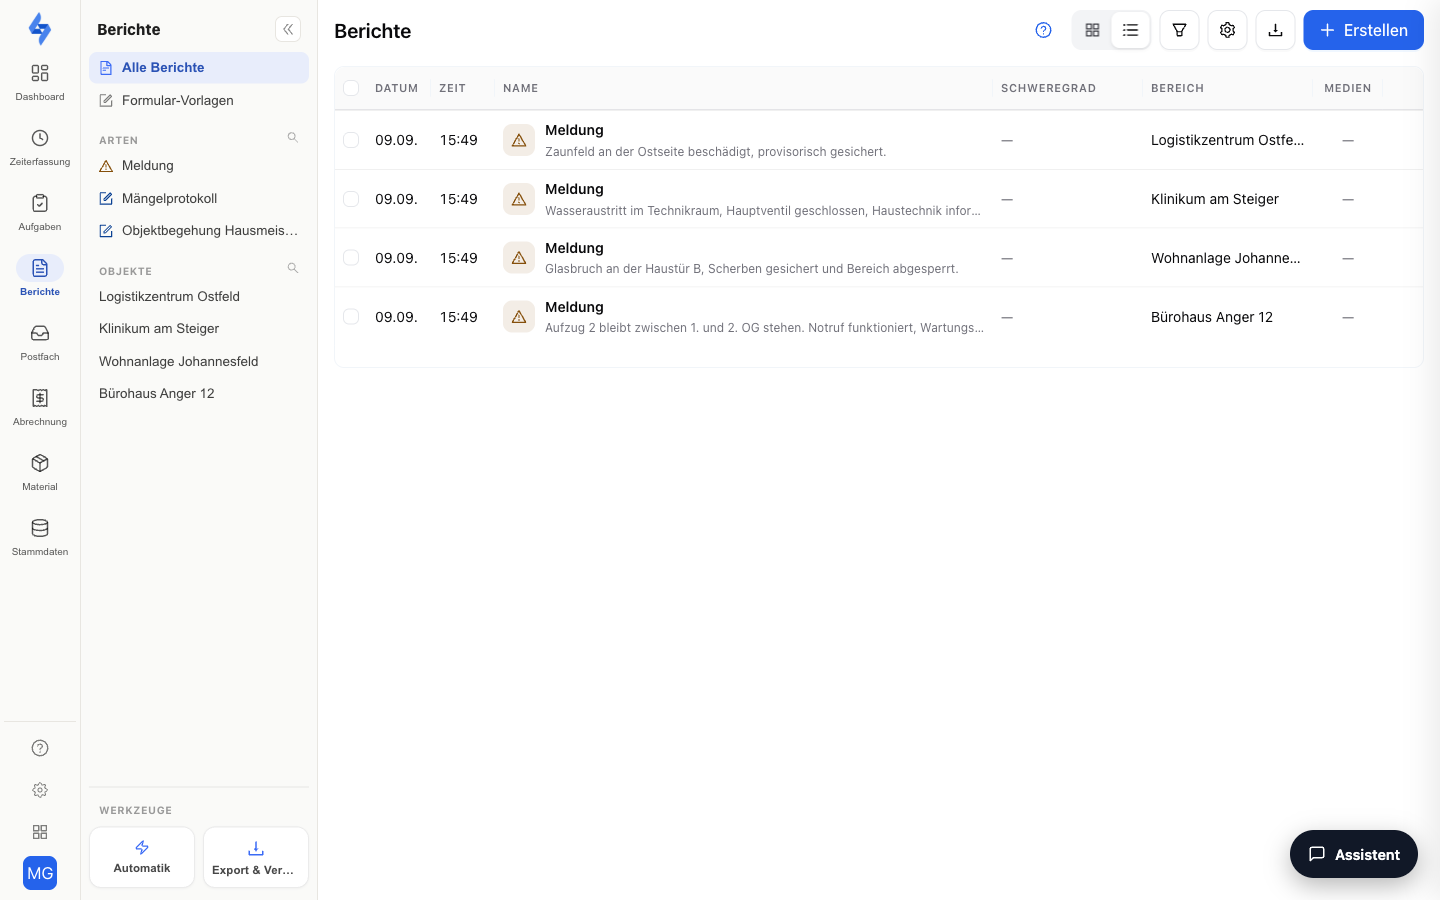
Reports, incidents, forms — how they relate
"Reports" is the umbrella term, not a third thing next to incidents and forms. There are exactly two kinds of entries:
| Kind | What it is |
|---|---|
| Incident report | A person's message: "Something happened here." Usually a photo plus a short text. |
| Completed form | A submitted answer to one of your form templates — checklist, inspection or handover protocol. |
That is why the main menu has a single entry Reports — there is no "Forms" submenu and no "Incidents" submenu. To narrow the list down to incident reports, use the Types quick filter: the Incident template sits there among your own templates.
What an incident report is exactly, which fields it has, how to change those fields and how category and severity are assigned is described on the Incident reports page.
Features Overview
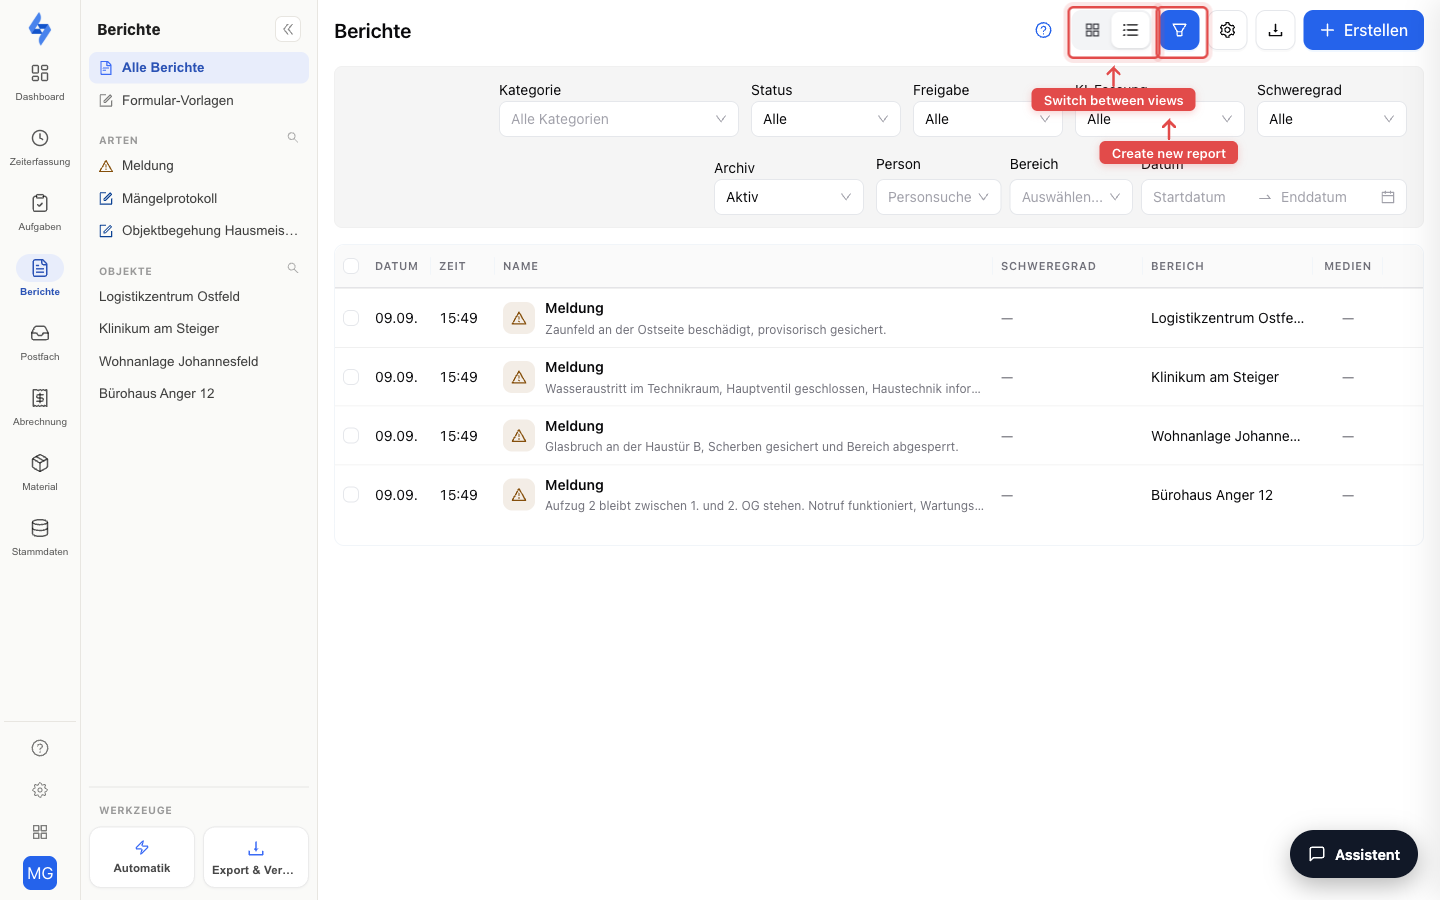
Unified List
Incidents and form submissions appear together, sorted by capture time by default (newest first). Use the switcher in the header to toggle between card view (tiles with preview) and table view (compact rows). In the table view, you can show and hide individual columns via the columns menu.
In table view, clicking the Date column header sorts the list (ascending or descending); a second click flips the direction. Sort order, page and page size are kept in the web address — reloading the page or using the browser's back button returns to the same spot in the list. Changing pages jumps back to the top of the list.
An incident that has not yet been classified shows its AI-generated short title as its name or, until that is available, the first line of its text — plus the grey "Unclassified" badge. A small icon next to the name also shows how the incident came in: App, Manual (captured in the portal), QR ticket, or System (created by an automation rule).
Detail View
Clicking opens the report as a sidebar on top of the list:
- Incidents show description, photos, location and reporter — plus the Classification section with category and severity (Low · Medium · High · Critical). You set both values by hand here; AI classification can take that over, but it is switched off by default.
- Forms show all completed fields including photos and signatures. If an employee answered in another language and the AI function "Translate forms & reports" is active, free-text answers are shown in your language automatically — the Translated / Original switch flips back to the original version at any time, which always remains stored. If the response is waiting for an approval, the Approve and Ignore buttons appear here; after customer sending, the detail view shows "Sent on".
From the detail view you can export the individual report as a PDF (permission Export round evaluation; incidents additionally offer CSV and image download) and create a task from it. Form reports can also be sent by e-mail and passed on via a public share link; submitted form reports cannot be deleted, but they can be cancelled with a mandatory reason — they remain visible with a cancellation note. Only drafts can be deleted.
Every detail view has its own web address — the link to a report can be shared directly.
Multi-select
In table view, use the checkboxes at the start of each row to select several reports at once. As soon as at least one report is selected, an action bar appears in the table header showing the count and, depending on the selection, these actions:
- Acknowledge — incidents only: confirms that the incident has been reviewed.
- Archive — archives the selected reports immediately; a reason is optional and goes into the history. Archived reports stay readable and exportable but can no longer be changed; you can restore them from the detail view at any time. If your tenant has switched on Archiving and restoring require approval under Settings → Policies, the button reads Request archiving: the reason is then mandatory and the request only takes effect once a second person approves it (four-eyes principle) — exactly as with route logs. Details under Change control.
- Clear selection — discards the selection without changing anything.
If at least one archiving request is waiting for your decision, the header shows an "Archive requests" button with the count.
Drafts
Saved-in-progress forms appear in the list with the status Draft. Clicking the draft opens the form in the editor again — right where you left off, even on a different device. Drafts only exist for forms; an incident report is always captured in one go.
Creating a Report
The "Create report" button leads to the create page: choose a template (incident or one of your form templates), then fill it in.
The sidebar on the left
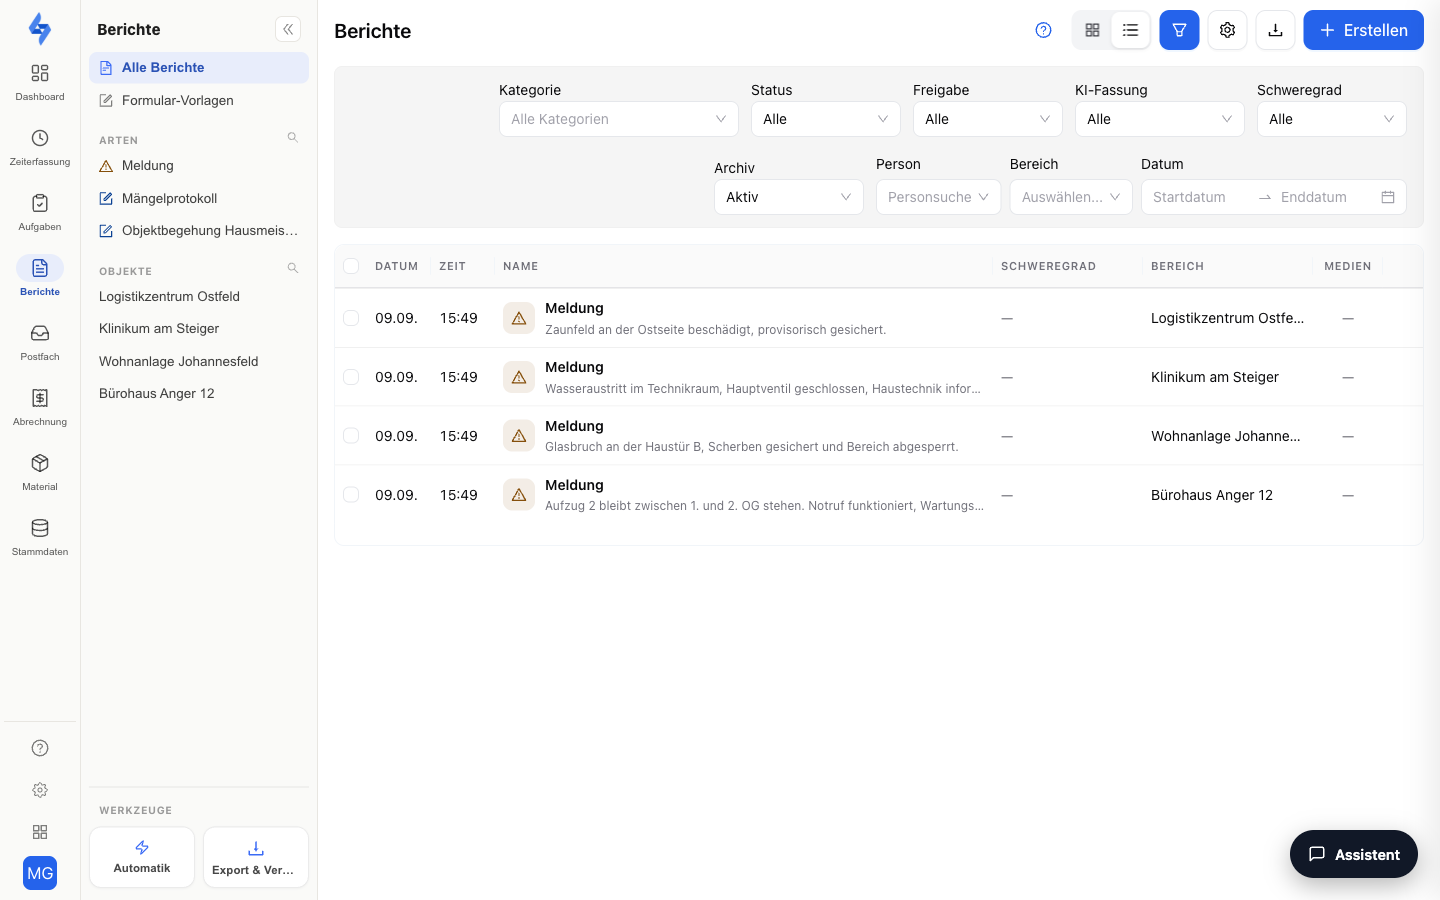
The sidebar to the left of the list is both navigation and quick filter:
- All reports clears every filter and shows the complete data set again.
- Form templates takes you to the settings. There you edit existing templates and create new ones — including with AI from a description or a PDF. Every new template then appears as its own entry under "Types".
Quick filters "Types" and "Objects"
Below that, two sections narrow the list with a single click:
- Types lists every active form template with its icon and colour — plus the "Incident" template. One click shows only reports of that type, a second click removes the filter again.
- Objects narrows the list to a single property in the same way. Properties sharing a name carry the street as a second line (falling back to city or property ID "#ID").
Type and object can be combined; the selected entries stay highlighted. Both sections have a magnifier next to the heading: it reveals a search field that filters the entries in the panel. From nine entries on, a "Show more" link appears below.
Additional filters in the header
The filter button in the header reveals an extra filter row above the list. "Reset filters" clears all filters at once — including those set in the sidebar. If the filter row is collapsed but a filter is active (including one from the left sidebar — Types or Objects), the list shows a hint, "The list is filtered.", with the buttons "Show filters" and "Reset filters" — so there is always a visible way back to the full list.
| Filter | Description |
|---|---|
| Category | Incident category (from the settings) or a specific form template |
| Status | All, submitted, draft or cancelled |
| Severity | Incident severity (Low · Medium · High · Critical) or Defect for forms with a reported defect |
| Approval | Forms only: All, Approval pending (waiting for Approve/Ignore), Approved or Rejected — once one of the three values is set, the filter hides incidents from the list |
| AI version | Incidents only: Undecided shows incidents whose AI text version has not yet been approved or ignored. If there are any, a hint with the count and a "Show" button in the header already points to them |
| Employee | Reports captured by a specific person |
| Property | Reports of a specific property |
| Archive | Active (default), Archived or All |
| Date range | Start and end date, or use the quick picks Today, This week, This month, Last week or Last month |
Good to Know
:::tip Note
- Incidents can be enabled or disabled per property; optionally, you can require that incidents may only be captured on site at the property (location check).
- You manage form templates in the settings under Form templates — they can also be generated there via AI from a description, a PDF or an Excel/CSV file. The "Incident" template lives there too; that is where you change the fields of an incident report.
- New incidents and submitted forms can trigger automation rules (e.g. immediate notification of the operations manager) — but the matching rule first has to be created and switched on in the Automation area. Nothing is forwarded and nothing is escalated on its own.
- The Export button in the header exports the filtered list as CSV or PDF (permission Export round evaluation); the file appears under Export & dispatch.
- What you see depends on your permissions: with only one of the two permissions, you see the matching part (only incidents or only forms).
- When filling out a form — in the portal as well as in the LiteLog app, including offline — it appears in the employee's account language, provided the template has been translated; see Form editor.
- Reports can be sent to the customer — optionally only after approval and with an AI draft in the customer's language. Details on Approval & Customer Sending.
- If a filter combination produces no matches, the empty state offers a "Reset filters" button so you don't have to hunt down the active filters one by one. :::
Permissions
:::info Permission To use this page, you need the View incidents or View form responses permission. Contact your administrator if you do not have access. :::
| Action | Permission |
|---|---|
| See incidents | View incidents |
| See form submissions | View form responses |
| Create an incident | Create incidents |
| Fill out a form | Fill forms |
| Single PDF / list export | Export round evaluation |
| Cancel a report / delete a draft | Delete reports |
| Delete an incident | Delete round evaluation |